Combining Color and Gray Scale Photo Using Color Isolation Technique in Photoshop
This tutorial teaches us on how to combine a black and white photo with a colored photo using the color isolation technique in Photoshop. This tutorial was made using a Photoshop CS4.
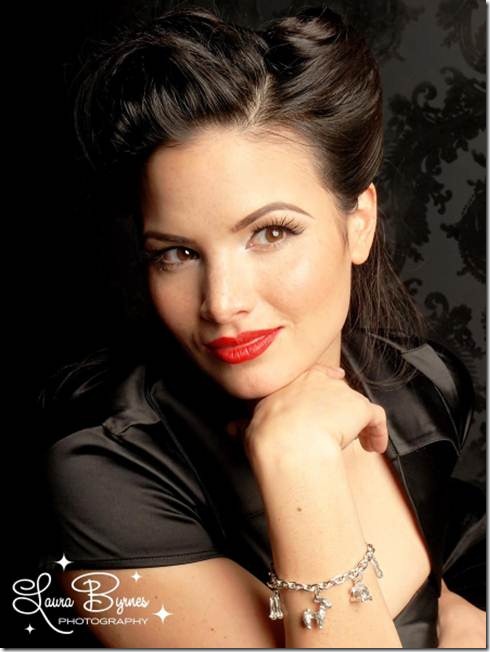
(Image courtesy of Laura Byrnes Photography : http://laurabyrnesphotography.com/)
Load the image on Photoshop.
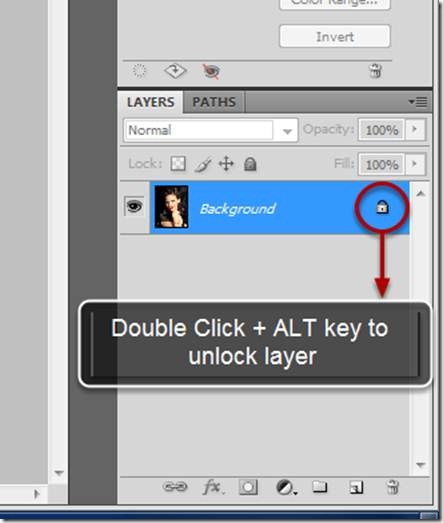
Double click the Lock Icon while holding the "ALT" key to unlock the layer.
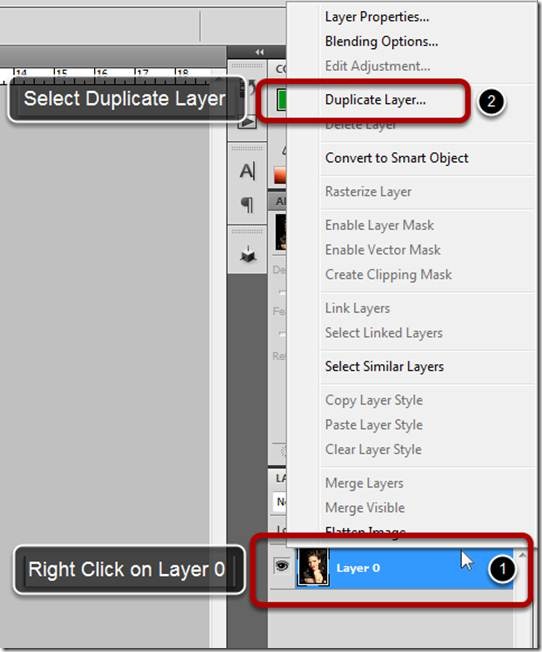
1. Right click on Layer 0 to access the shortcut menu.
2. Select "Duplicate Layer..." to duplicate the layer.
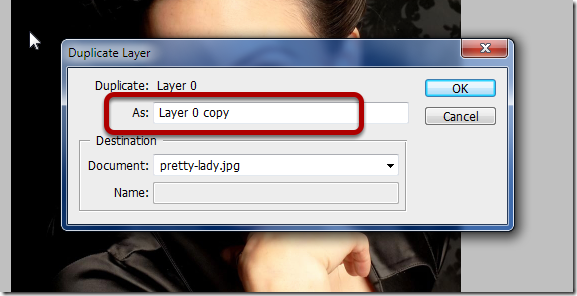
Rename Layer 0 copy to Layer 1 (you can name whatever you want).
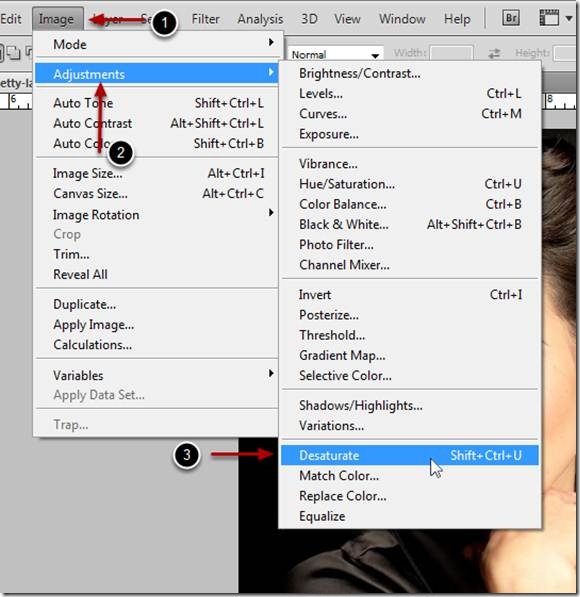
Select Layer 0 on Layer Panel and Desaturate it. (For the shortcut key, use "Shift+Ctrl+U")
1. Select image on the menu bar.
2. Select Adjustments
3. Select Desaturate
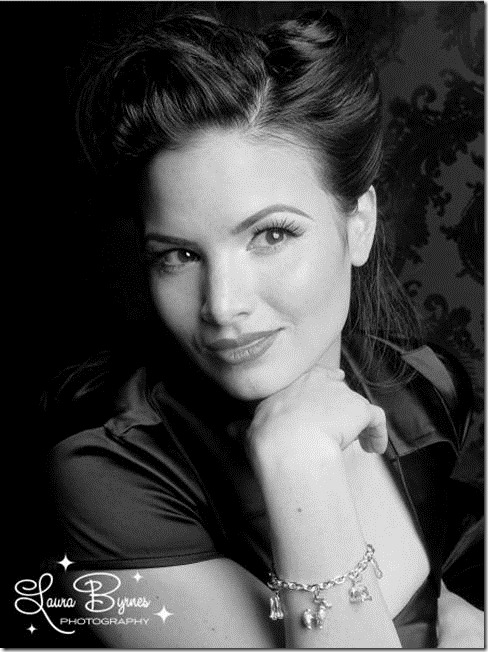
Layer 0 will be converted to gray scale mode as shown.
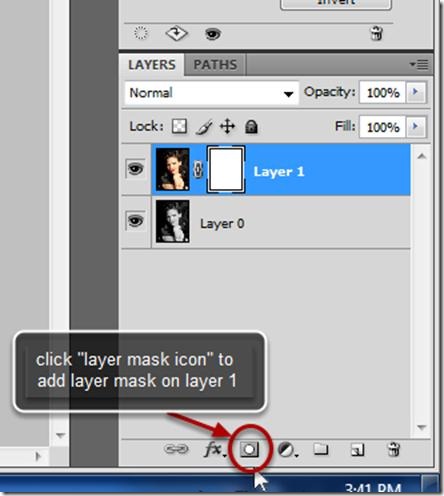
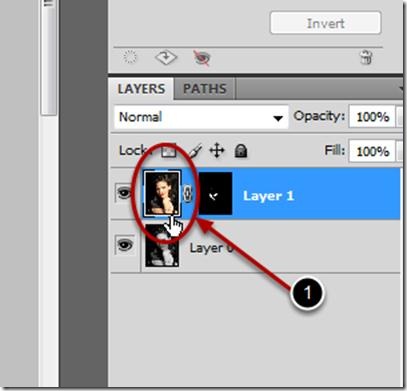
On Layers panel, select Layer 1, one with the colored image and apply a layer mask on it.
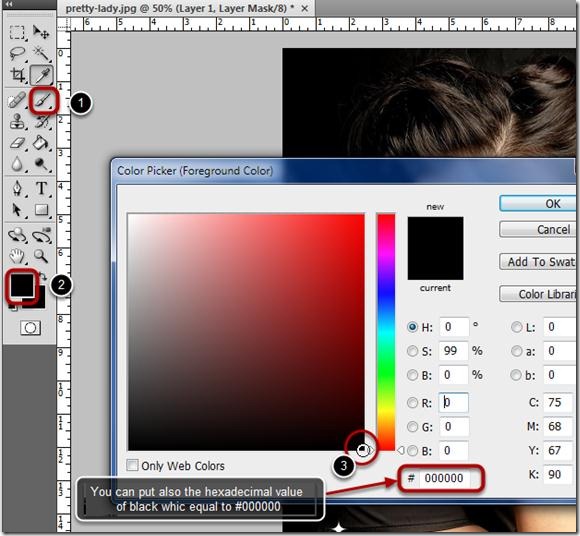
1. Select Brush (shortcut key: "B") tool on Tool Panels
2. Click on "Set Foreground Color" icon
3. Select "Black" by selecting the bottom-right corner of the color picker window
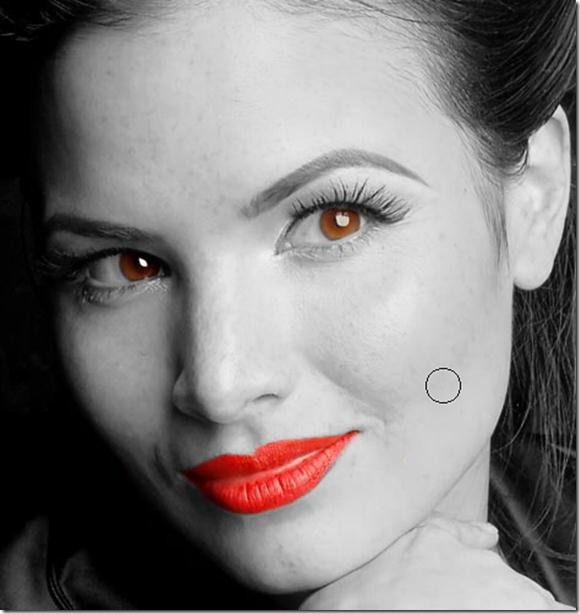
Now apply it the image except for the lips and the eyes as shown on the image above.
To make the lips and eye brighter, we will use the Dodge tool.
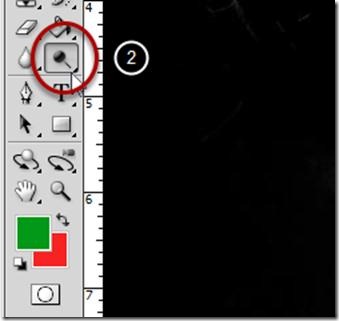
Select Dodge Tool (Shortcut key: "O") and apply to both eyes and lips.
Step 1: Load Image on Photoshop

(Image courtesy of Laura Byrnes Photography : http://laurabyrnesphotography.com/)
Load the image on Photoshop.
Step 2: Unlock the Layer

Double click the Lock Icon while holding the "ALT" key to unlock the layer.
Step 3: Duplicate Layer

1. Right click on Layer 0 to access the shortcut menu.
2. Select "Duplicate Layer..." to duplicate the layer.
Step 4: Naming Layer

Rename Layer 0 copy to Layer 1 (you can name whatever you want).
Step 5: Desaturate "Layer 0"

Select Layer 0 on Layer Panel and Desaturate it. (For the shortcut key, use "Shift+Ctrl+U")
1. Select image on the menu bar.
2. Select Adjustments
3. Select Desaturate

Layer 0 will be converted to gray scale mode as shown.
Step 6: Adding Layer Mask on Layer 1

On Layers panel, select Layer 1, one with the colored image and apply a layer mask on it.

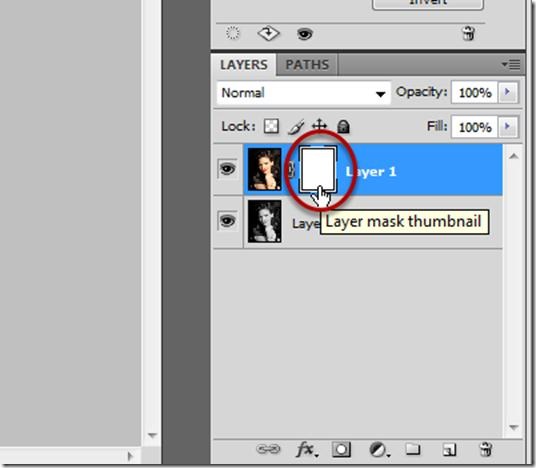
Make sure that layer mask is enabled before applying mask to your image. To enable, just click on the layer mask thumbnail next to your image layer thumbnail. When working with mask, there are only two colors involved, black and white. Black color erases and white do paint. You can also use different shades of grey to achieve different opacities.
Step 7: Applying Mask to your current layer

1. Select Brush (shortcut key: "B") tool on Tool Panels
2. Click on "Set Foreground Color" icon
3. Select "Black" by selecting the bottom-right corner of the color picker window
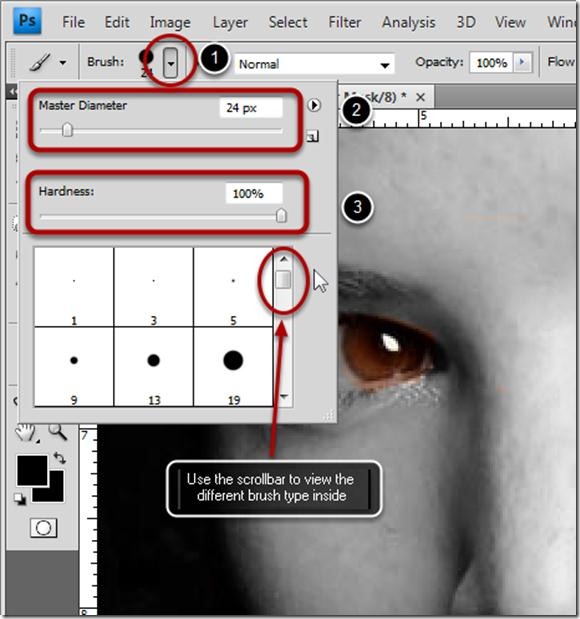
Changing Brush Strokes and Size

In changing the brush size, stroke, soft edge or hard edge of brush do the following:
1. On the Brush tool, select the pull down button.
2. Use the scrubber to change the brush size you want.
3. Set the hardness. In this tutorial, I set it to 100% to achieved the solid edge brush. If you want a softer edge slide the scrubber to the left.
Note: You can use [key to decrease and] key to increase the brush size while working with mouse.
Step 8: Applying the Mask Using Brush

Now apply it the image except for the lips and the eyes as shown on the image above.
Step 9: Finishing Your Project

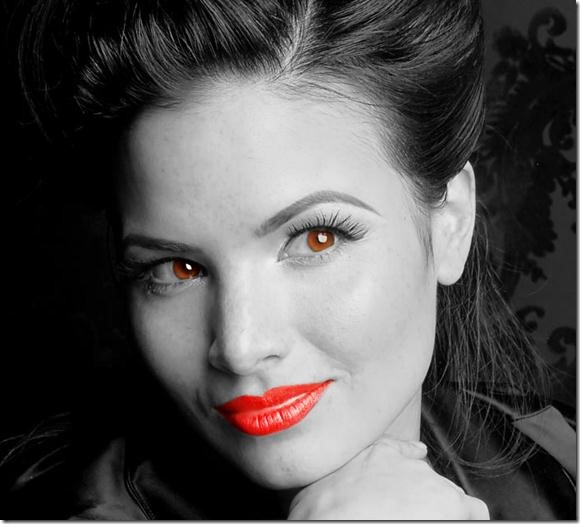
To make the lips and eye brighter, we will use the Dodge tool.

Select Dodge Tool (Shortcut key: "O") and apply to both eyes and lips.
Finished Project



Comments