Entering Points in AutoCAD: DIRECT DISTANCE ENTRY
You can draw a line by specifying the length of the line and its direction using Direct Distance Entry. The Direction is determined by the position of the cursor, and the length of the line is entered from the keyboard. If the ortho mode is on, you can draw lines along the X or Y axis by specifying the length of the line and positioning the cursor along the ortho. You can also use it with the other draw commands like the rectangle command. You can use Direct Distance Entry with polar tracking and SNAPANG (snap angle). For example if SNAPANG is 45-degree and ortho mode is off, you can draw a line at 45 or 135-degree direction by positioning the cursor and entering the distance from the keyboard. Similarly, if the polar tracking is on, you can position the cursor at the predefined angles and then enter the length of the line from the keyboard.
Example from the command line:
Command: LINE press enter key
Command: _line Specify first point: Start point
Specify next point or [Undo]: Position the cursor and then enter distance
Specify next point or [Undo]: Position the cursor and then enter distance
Specify next point or [Close/Undo]: Position the cursor and then enter distance
EXAMPLE:
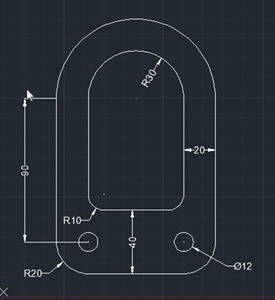
In this example, you will draw the object, as shown below, using Direct Distance Entry. The starting point is 2,2.

Example Drawing
Click on the image to preview
In this example, you will use the polar tracking option to draw lines. The polar tracking option allows you to track lines that are drawn at the specified angles. The default angle that is specified for polar tracking is 90-degree, such as 90, 180, 270, and 360. This is the reason you first need to add another angle of 45-degree to the polar tracking that will allow you to track the lines drawn at an angle divisible by 45, such as 45, 90, 135, and so on.
LET'S START!
Start a new file using the acad.dwt template.
Step 1: Click New button on the Standard Toolbar.
Step 2: Select acad.dwt template
Step 3: Click Open button.

Now, to add a 45-degree angle to polar tracking, right-click on the POLAR button on the status bar and choose Settings from the shortcut menu.

Select the Additional angles check box in the Polar Angle Settings area and then choose the New button. Enter 45 in the field that appears and then press ENTER. Choose OK to close the dialog box. Now, to turn the polar tracking on, choose POLAR button in the status bar or press F10.
 You can also turn polar tracking on or off while you are in a command. As you move the cursor to draw lines now, AutoCAD displays a tooltip that shows the length of the line and the angle at which it is being drawn.
The following is the Command prompt sequence for drawing as seen in the Example Drawing.
Command:
Command: line and press enter
Specify first point: 2,2
Specify next point or [Undo]: Move the cursor horizontally toward the right and when the tooltip appears with the polar angle, enter 2
Specify next point or [Undo]: .Move the cursor at an angle close to 45-degree and when the tooltip appears with the polar angle, enter 0.7071
Specify next point or [Close/Undo]: Move the cursor vertically upward and when the tooltip appears with the polar angle, enter 1
Specify next point or [Close/Undo]: Move the cursor horizontally toward the left and when the tooltip appears with the polar angle, enter 3
Specify next point or [Close/Undo]: Move the cursor vertically downward and when the tooltip appears with the polar angle, enter 1
Specify next point or [Close/Undo]: c to close the object
LET'S START!
Start a new file using the acad.dwt template.
Step 1: Click New button on the Standard Toolbar.
Step 2: Select acad.dwt template
Step 3: Click Open button.
Click on the image to preview

Now, to add a 45-degree angle to polar tracking, right-click on the POLAR button on the status bar and choose Settings from the shortcut menu.

Select the Additional angles check box in the Polar Angle Settings area and then choose the New button. Enter 45 in the field that appears and then press ENTER. Choose OK to close the dialog box. Now, to turn the polar tracking on, choose POLAR button in the status bar or press F10.
The following is the Command prompt sequence for drawing as seen in the Example Drawing.
Command:
Command: line and press enter
Specify first point: 2,2
Specify next point or [Undo]: Move the cursor horizontally toward the right and when the tooltip appears with the polar angle, enter 2
Specify next point or [Undo]: .Move the cursor at an angle close to 45-degree and when the tooltip appears with the polar angle, enter 0.7071
Specify next point or [Close/Undo]: Move the cursor vertically upward and when the tooltip appears with the polar angle, enter 1
Specify next point or [Close/Undo]: Move the cursor horizontally toward the left and when the tooltip appears with the polar angle, enter 3
Specify next point or [Close/Undo]: Move the cursor vertically downward and when the tooltip appears with the polar angle, enter 1
Specify next point or [Close/Undo]: c to close the object


Comments